Windows Server seems daunting from anyone coming from a Linux background. Having recently made the switch myself, I’ll be going through a set of tutorials detailing my setup, and how to get started with some standard web application technologies, and how to get them running on Windows Server 2012 with IIS.
Today I’ll be taking a look at Node.js, and how to get a Node.js application up and running quickly and easily. This guide is designed for working with a clean Windows Server 2012 installation with IIS installed already. I shall be using a 1 file Hello World application. In 99% of cases, the process is the same regarding your application.
Overview
Step 1. Install Prerequisites
Step 2. Install Node
Step 3. Install IIS Rewrite module
Step 4. Install IISNode
Step 5. Create/Copy your Node application
Step 6. Register it in IIS
Step 7. Configure your app
Step 8. Test
Step 1. Prerequisites
You should have already installed IIS on your Windows Server. This is easy to do, and there are various other guides that detail how to do so, this will not be covered in this tutorial.
Step 2. Install Node
Our first step is to install Node. So head over to https://nodejs.org, and download whatever version takes your fancy (I’m using 4.3.2 LTS).
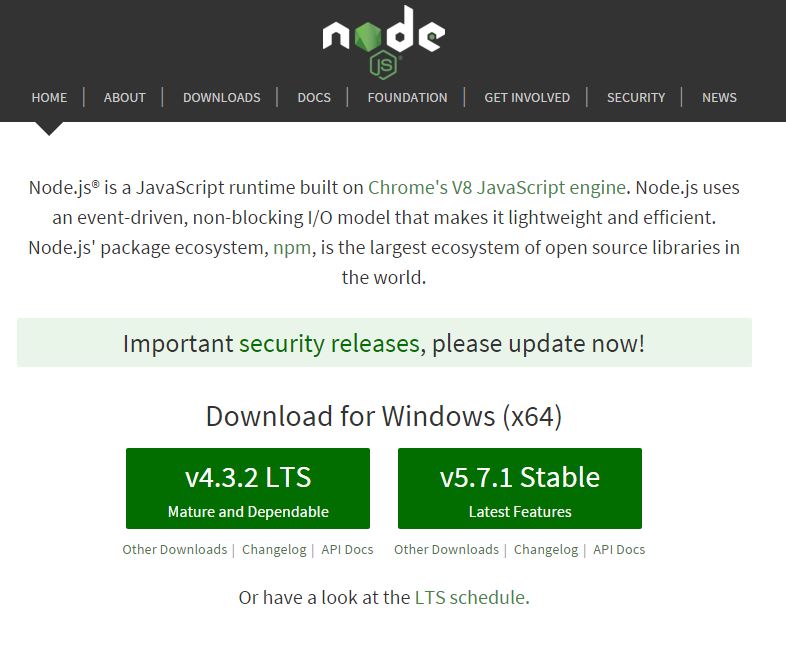 Unless you have reason not to, I would recommend the latest LTS release due to stability and support.
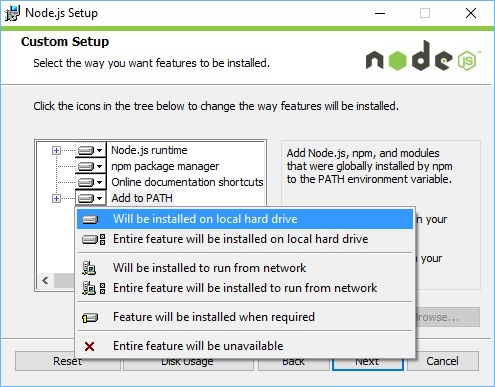
Go ahead and install it onto the server, when you get to the setup, page below, make sure to tick Add to PATH, it will make things so much easier in the future.
Step 3. Install IIS Rewrite module
Next we want to install the IIS Rewrite Module. This step isn’t strictly necessary, but to save loads of unnecessary time matching routes for your application requests, we use this module. 0 effort to setup for the amount of use it provides.
You can grab it from here: IIS.net.
Go ahead and install it, its a small installation, and shouldn’t take more than a few seconds. There are no options you need to configure.
Step 4. Install IISNode
There are 2 options for using Node with IIS, either directly registering it with IIS, or utilising a very nice IIS Module, called IISNode, by Tomasz Janczuk. For all standard purposes, IISNode should suit your needs, and this tutorial will use it.
So go ahead and download it from Github. Download the right architecture version for your server. The direct links can be found in the project description, specifically here:

Install it on the server too. The process is pretty simple, and should take long.
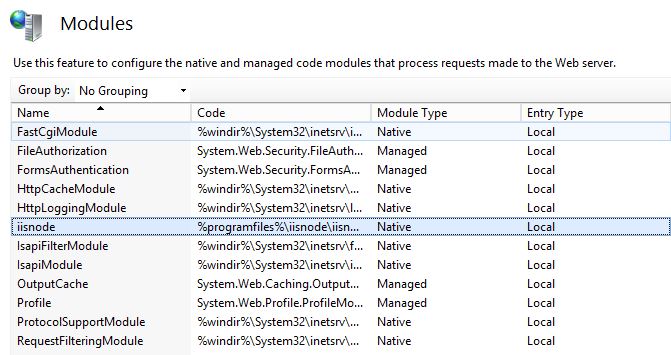
Once installed, we want to confirm that its correctly registered with IIS, so go ahead and open the program IIS Manager now, and open Modules (its in the IIS group). You should see something like this:
Step 5. Create/Copy your Node application
I’ll be walking through this step using a small hello world app, I would advise you do the same, as the process of deployment is pretty much the same as Linux.
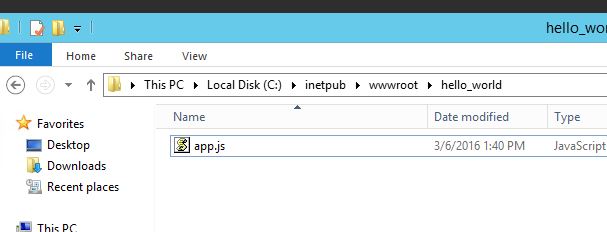
You’ll notice that Windows Server has a folder in C: called inetpub, and inside that wwwroot. These are the default folders used for keep applications. You can use any location in the filesystem, but I would recommend placing your applications in subfolders here, e.g.
C:/inetpub/wwwroot/myproject1/app.js
So copy/deploy however you like your application.
p.s. Remember that if you replace/update your Node application, you should re-do the steps outlined in Step 6, to make sure your new source is correctly configured.
Step 6. Register it in IIS Manager
Remember the IIS Manager we used earlier? You need that again now, as it’s time to register your application in order to make it accessible, so open it again.
First we want to add a new site, so right-click your local machine, and click Add Website… (see below)

You’ll get a popup. Its pretty self explanatory, here it is filled in with my application information:
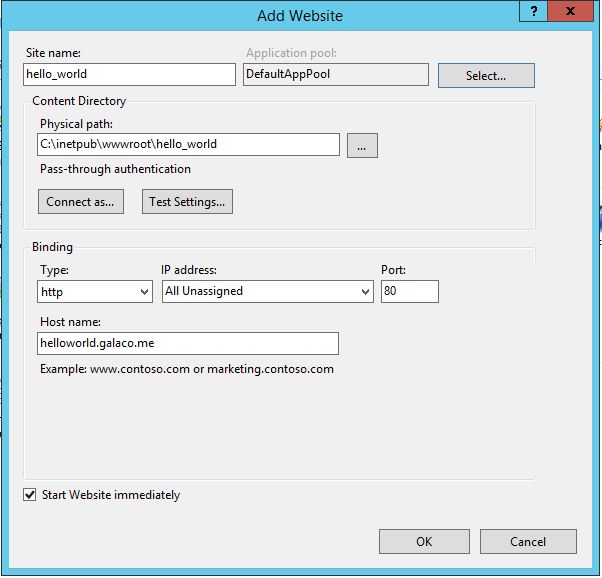
Take note of your Application pool name. You’ll need that later for setting up permissions.
Step 7. Configure your app
Correct port, correct permissions, web.config
At this point, we have a server with Node installed, and our application on the server. This is good, as we are nearly complete. All that’s left is to configure our application so IIS can read and understand it.
The first is file permissions, as the IIS user needs to be able to read and execute (and possibly write).
- Right-click project folder, and select
Properties, then open theSecuritytab. SelectEdit: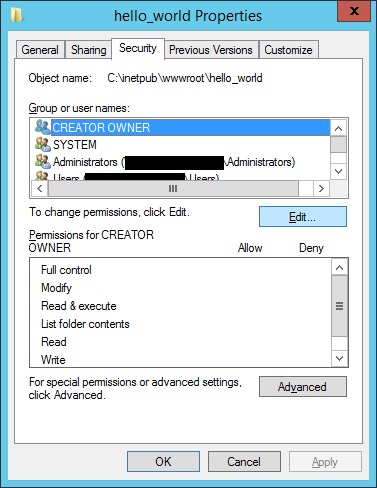
- Select
Addin the next Popup, and enter the information just as in the capture below, taking care to replaceDefaultAppPoolwith the Application pool name you took note of in the previous step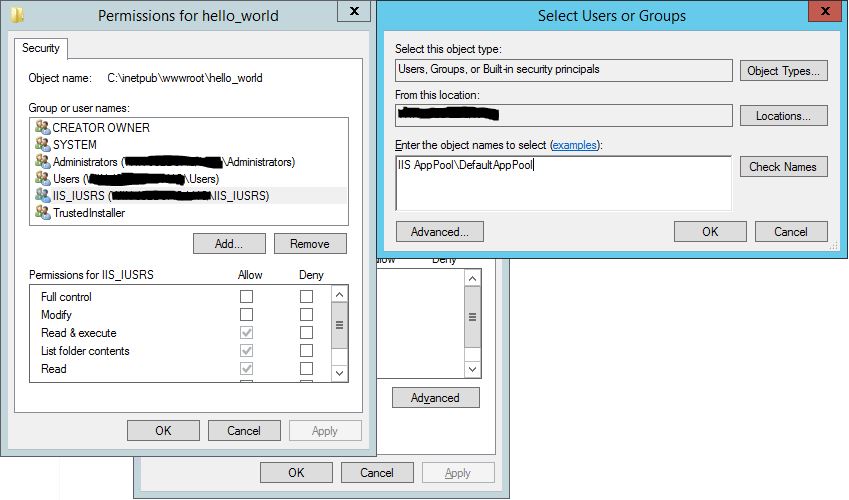
- Now tick
ReadandExecute, pressApply.
p.s. (Your application may need write permissions on your folder. If your receive 403 errors when accessing your site, you need to add Writepermissions to relevant files/folders).
With that done, navigate into your projects Root directory. You need to create a config file that IISNode can read and understand. This file is aptly named web.config.
Create a new file called web.config, paste the following into it, and save it in your applications root directory.

The config is pretty self explanatory, I won’t go into detail here on its parameters and configuration, but feel free to mess around with it later, particularly entries regarding environment, as they are hard-coded for the purpose of this tutorial, and you will probably want Node to control your environment.
The final configuration only matters if you plan on making your application PUBLIC, skip to Step 8 if this is a local only application. This step requires you to configure the port you are listening on, and (if relevant) the url. This depends on your source; Its up to you to determine how your application is configured, with different environments/configurations, but your live config must match what is described below.
Your PORT should be set to: process.env.PORT

e.g.
Step 8. Test
Your last step is to test it.
If your application is local only, or can be configured to listen on localhost (do test before pointing domain(s) to your app):
- Open a command prompt either in/or navigate to your applications root directory, and start your application by running either:
npm startornode.exe app.js - Open Internet Explorer, and navigate to
http://localhost:YOUR-APPS-LISTEN-PORT

Hey presto, you should get the response you want! This is great, if you application is local only, you are done, and have successfully configured your new Windows Server 2012 to run a Node application.
If your application wants to be publicly accessible, its time to make sure your app is configured to listen with the correct URL and PORT. Set your default environment to whatever contains the correct settings (this can be defined in web.config, and point whatever domain you set up your application with in IIS to your server. Soon as your DNS entries are updated, visit your domain.
Hey presto, you should get the response you want! This is great, you are done, and have successfully configured your new Windows Server 2012 to run a publicly accessible Node application.
Well done, Windows Server is much more difficult to get started with than a Linux server for web applications, especially if you want to avoid WAMP. You have successfully achieved the same as could be done in Linux in 4 easy steps (excluding one-time installations). Remember: Create, Register, Configure, Permissions and you should be set.
eline sağlık =))